
In this blog, we will build a RAG application that allows users to ask questions from their documents. We call it Documents QnA RAG App. You can use it to ask questions from documents you uploaded to Langbase Memory.
First we will create a Langbase memory, upload data to it, and then connect it to a pipe. We will then create a Next.js application that uses Langbase SDK to use the pipe to generate responses.
Let's get started!
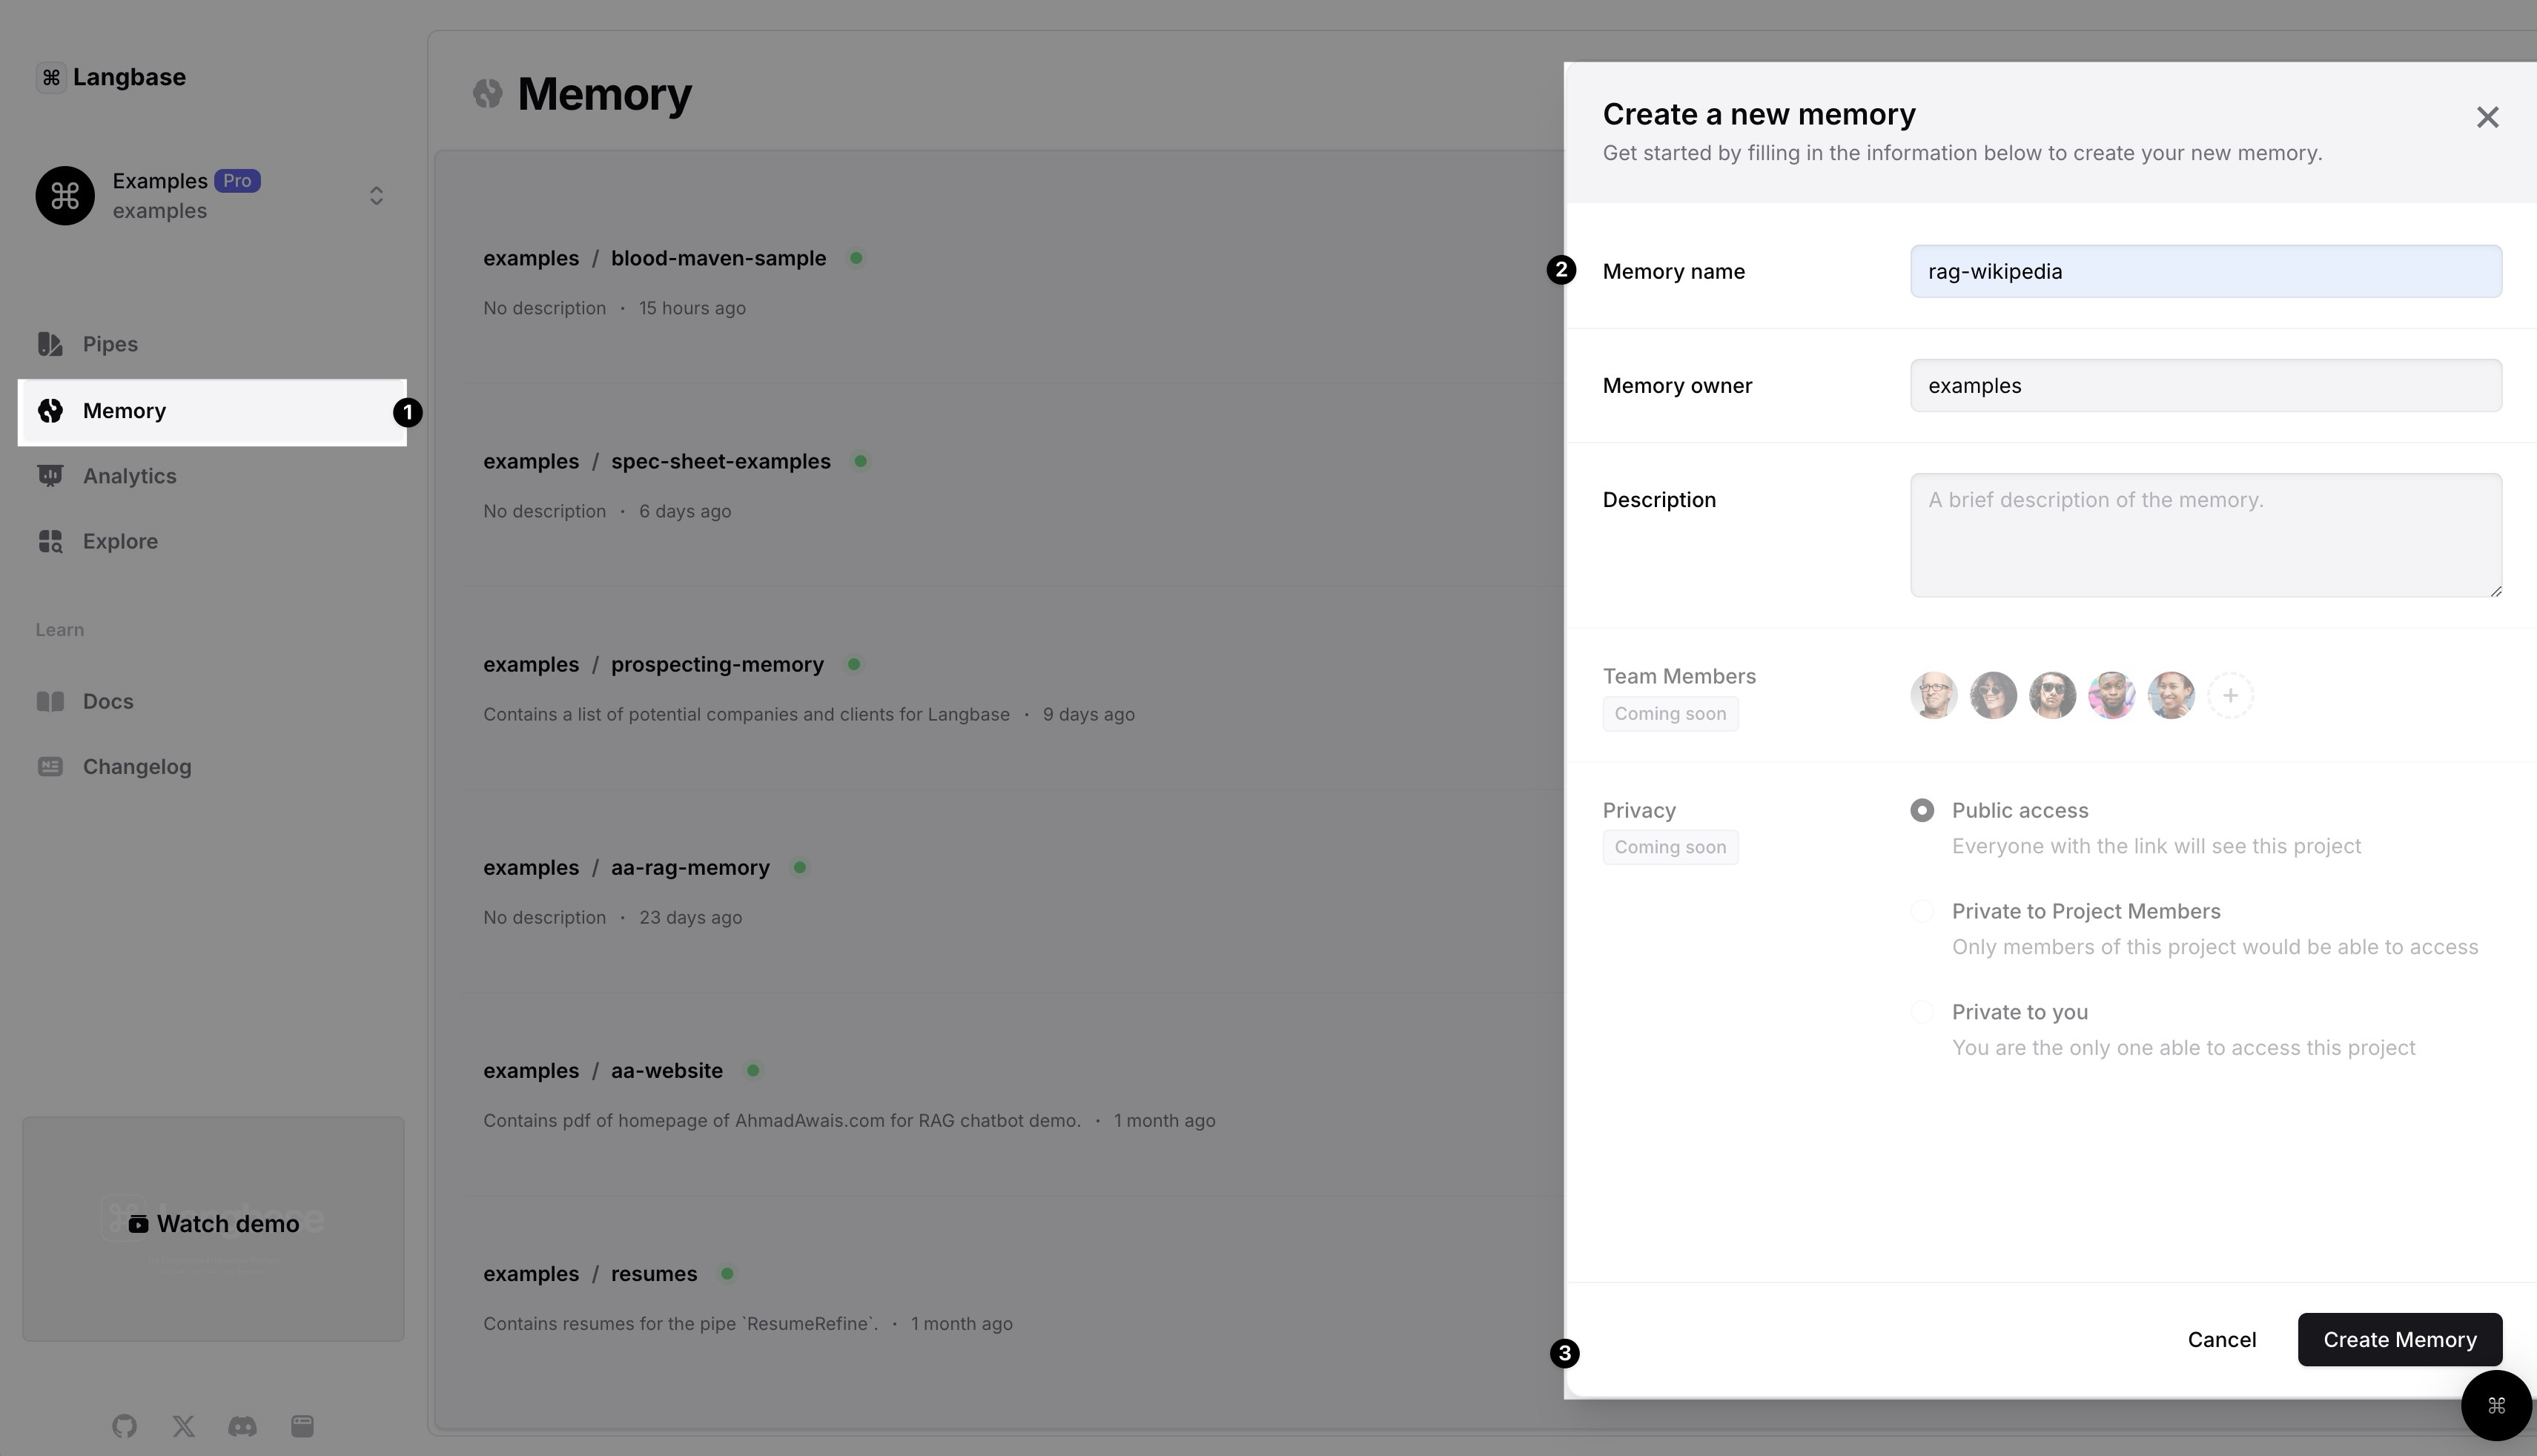
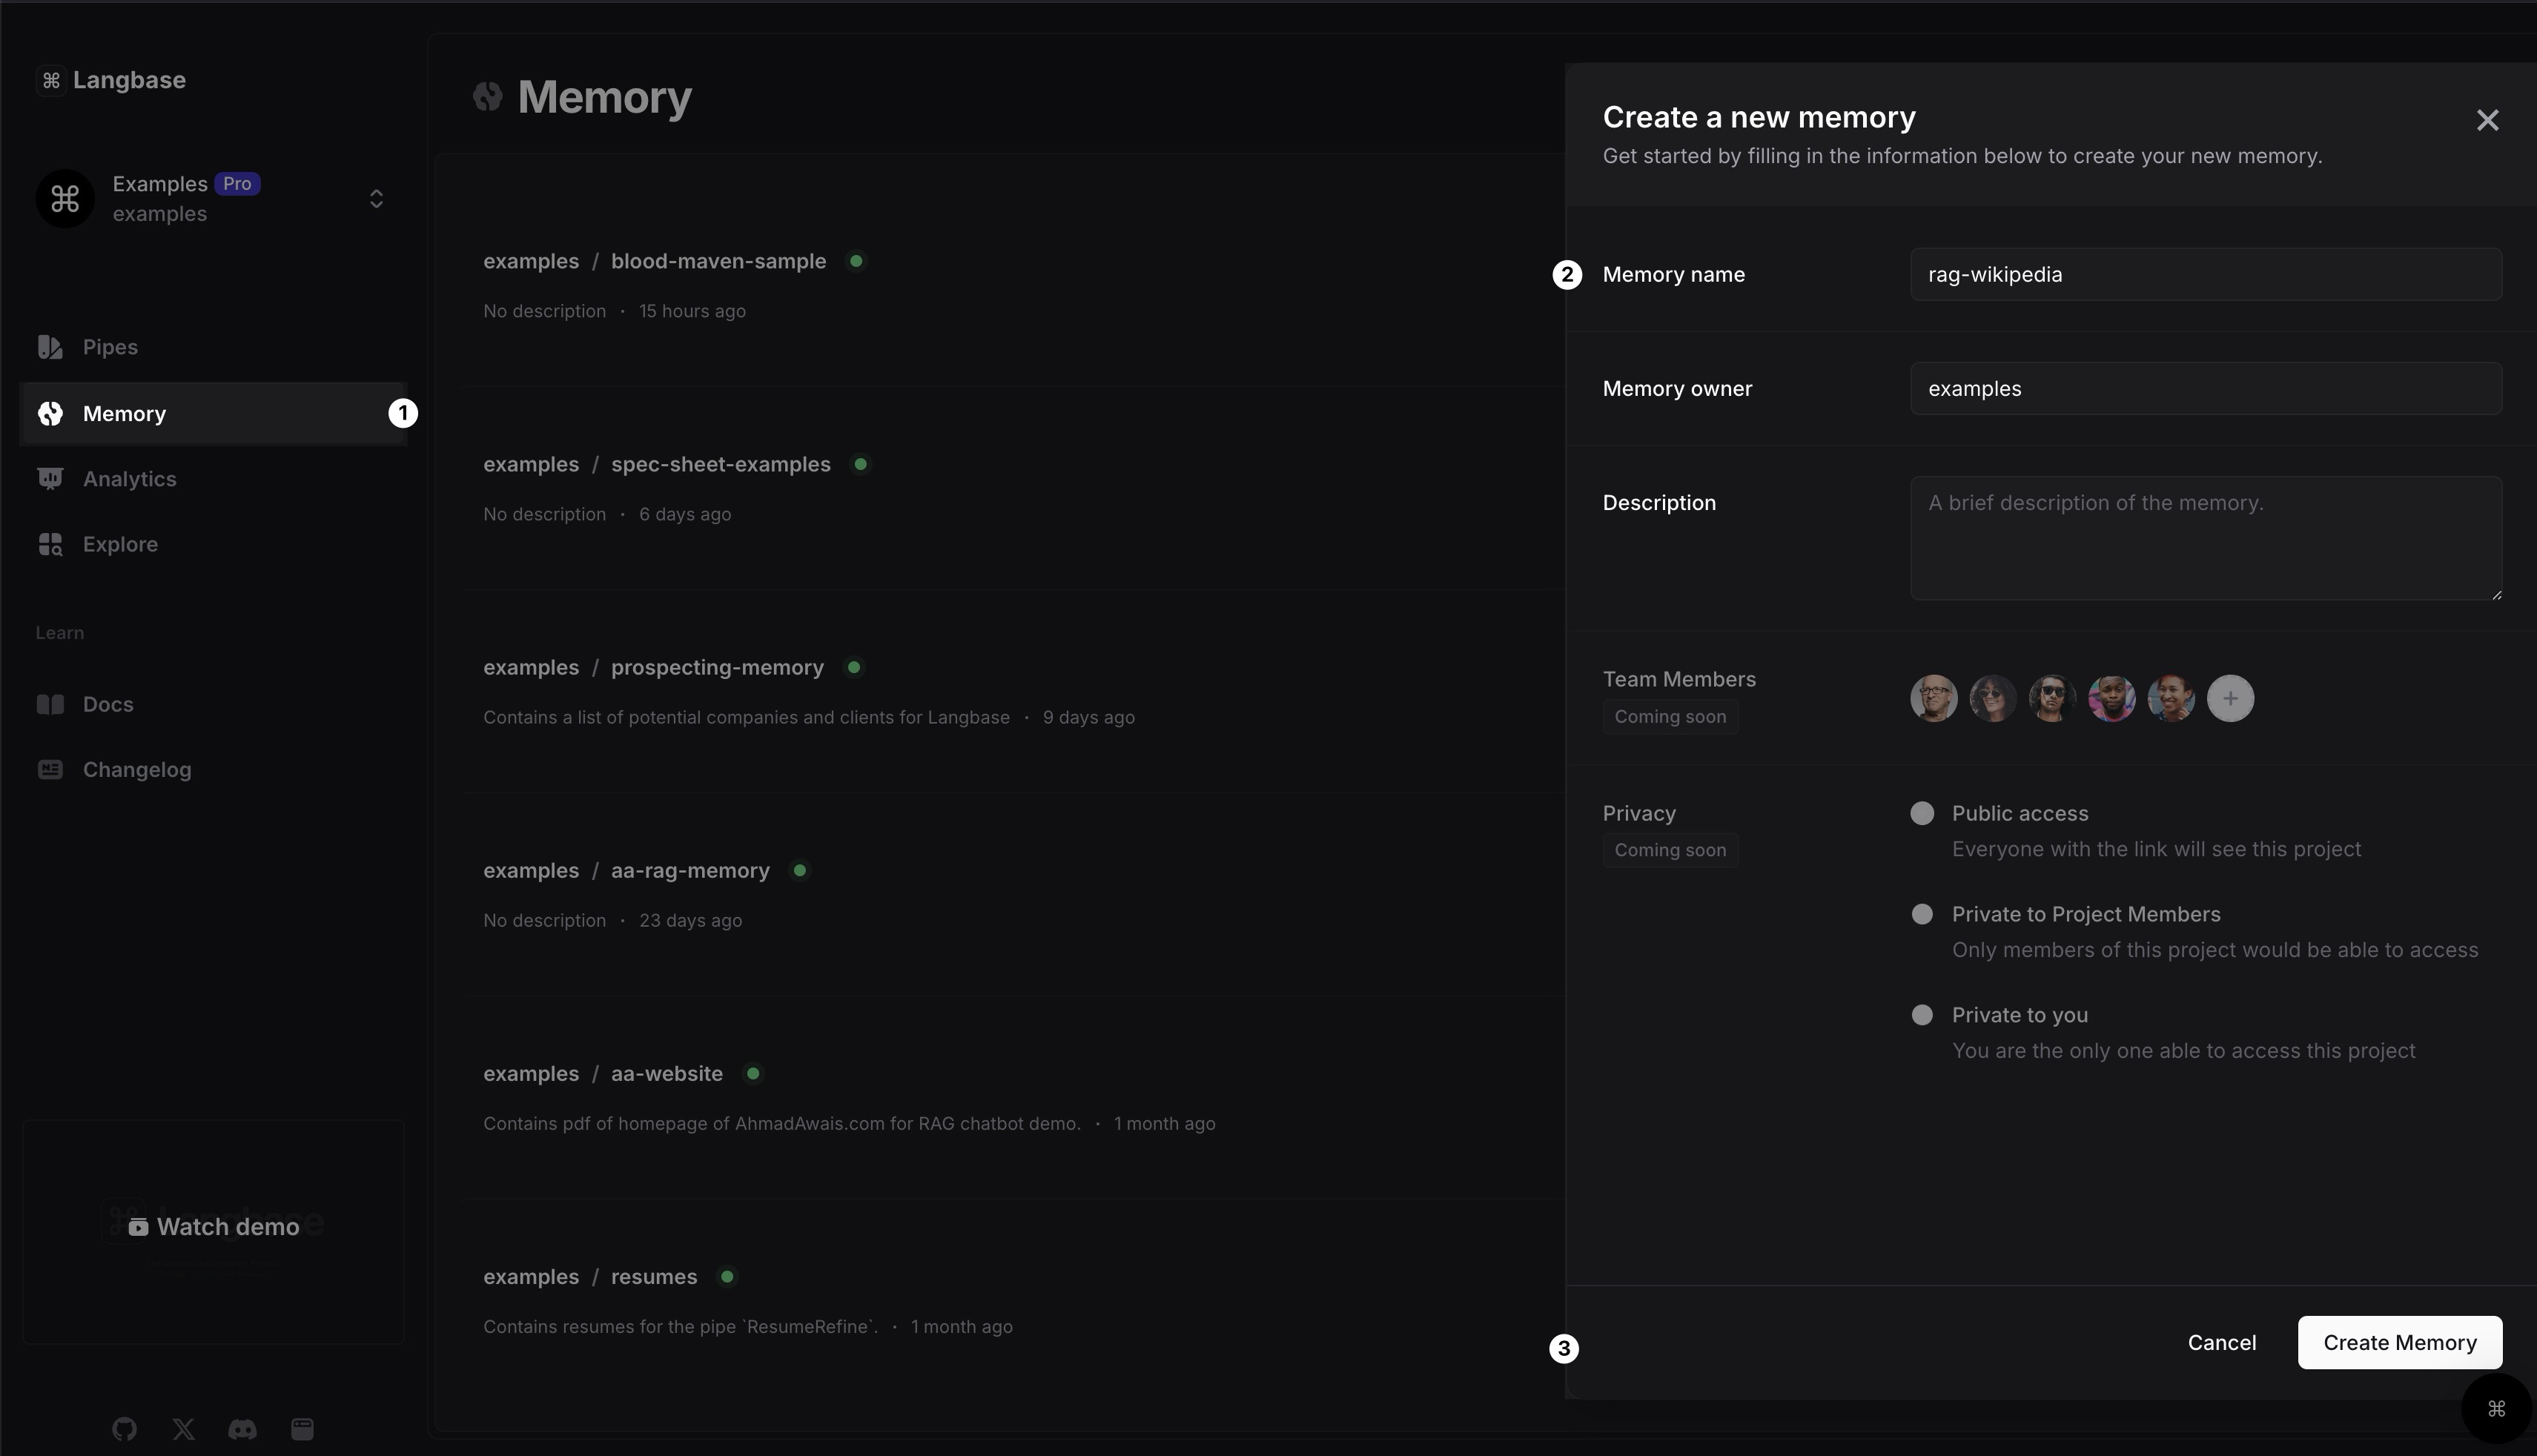
Step 1: Create a Memory
In Langbase dashboard, navigate to Memory section, create a new memory and name it rag-wikipedia. You can also add a description to the memory.
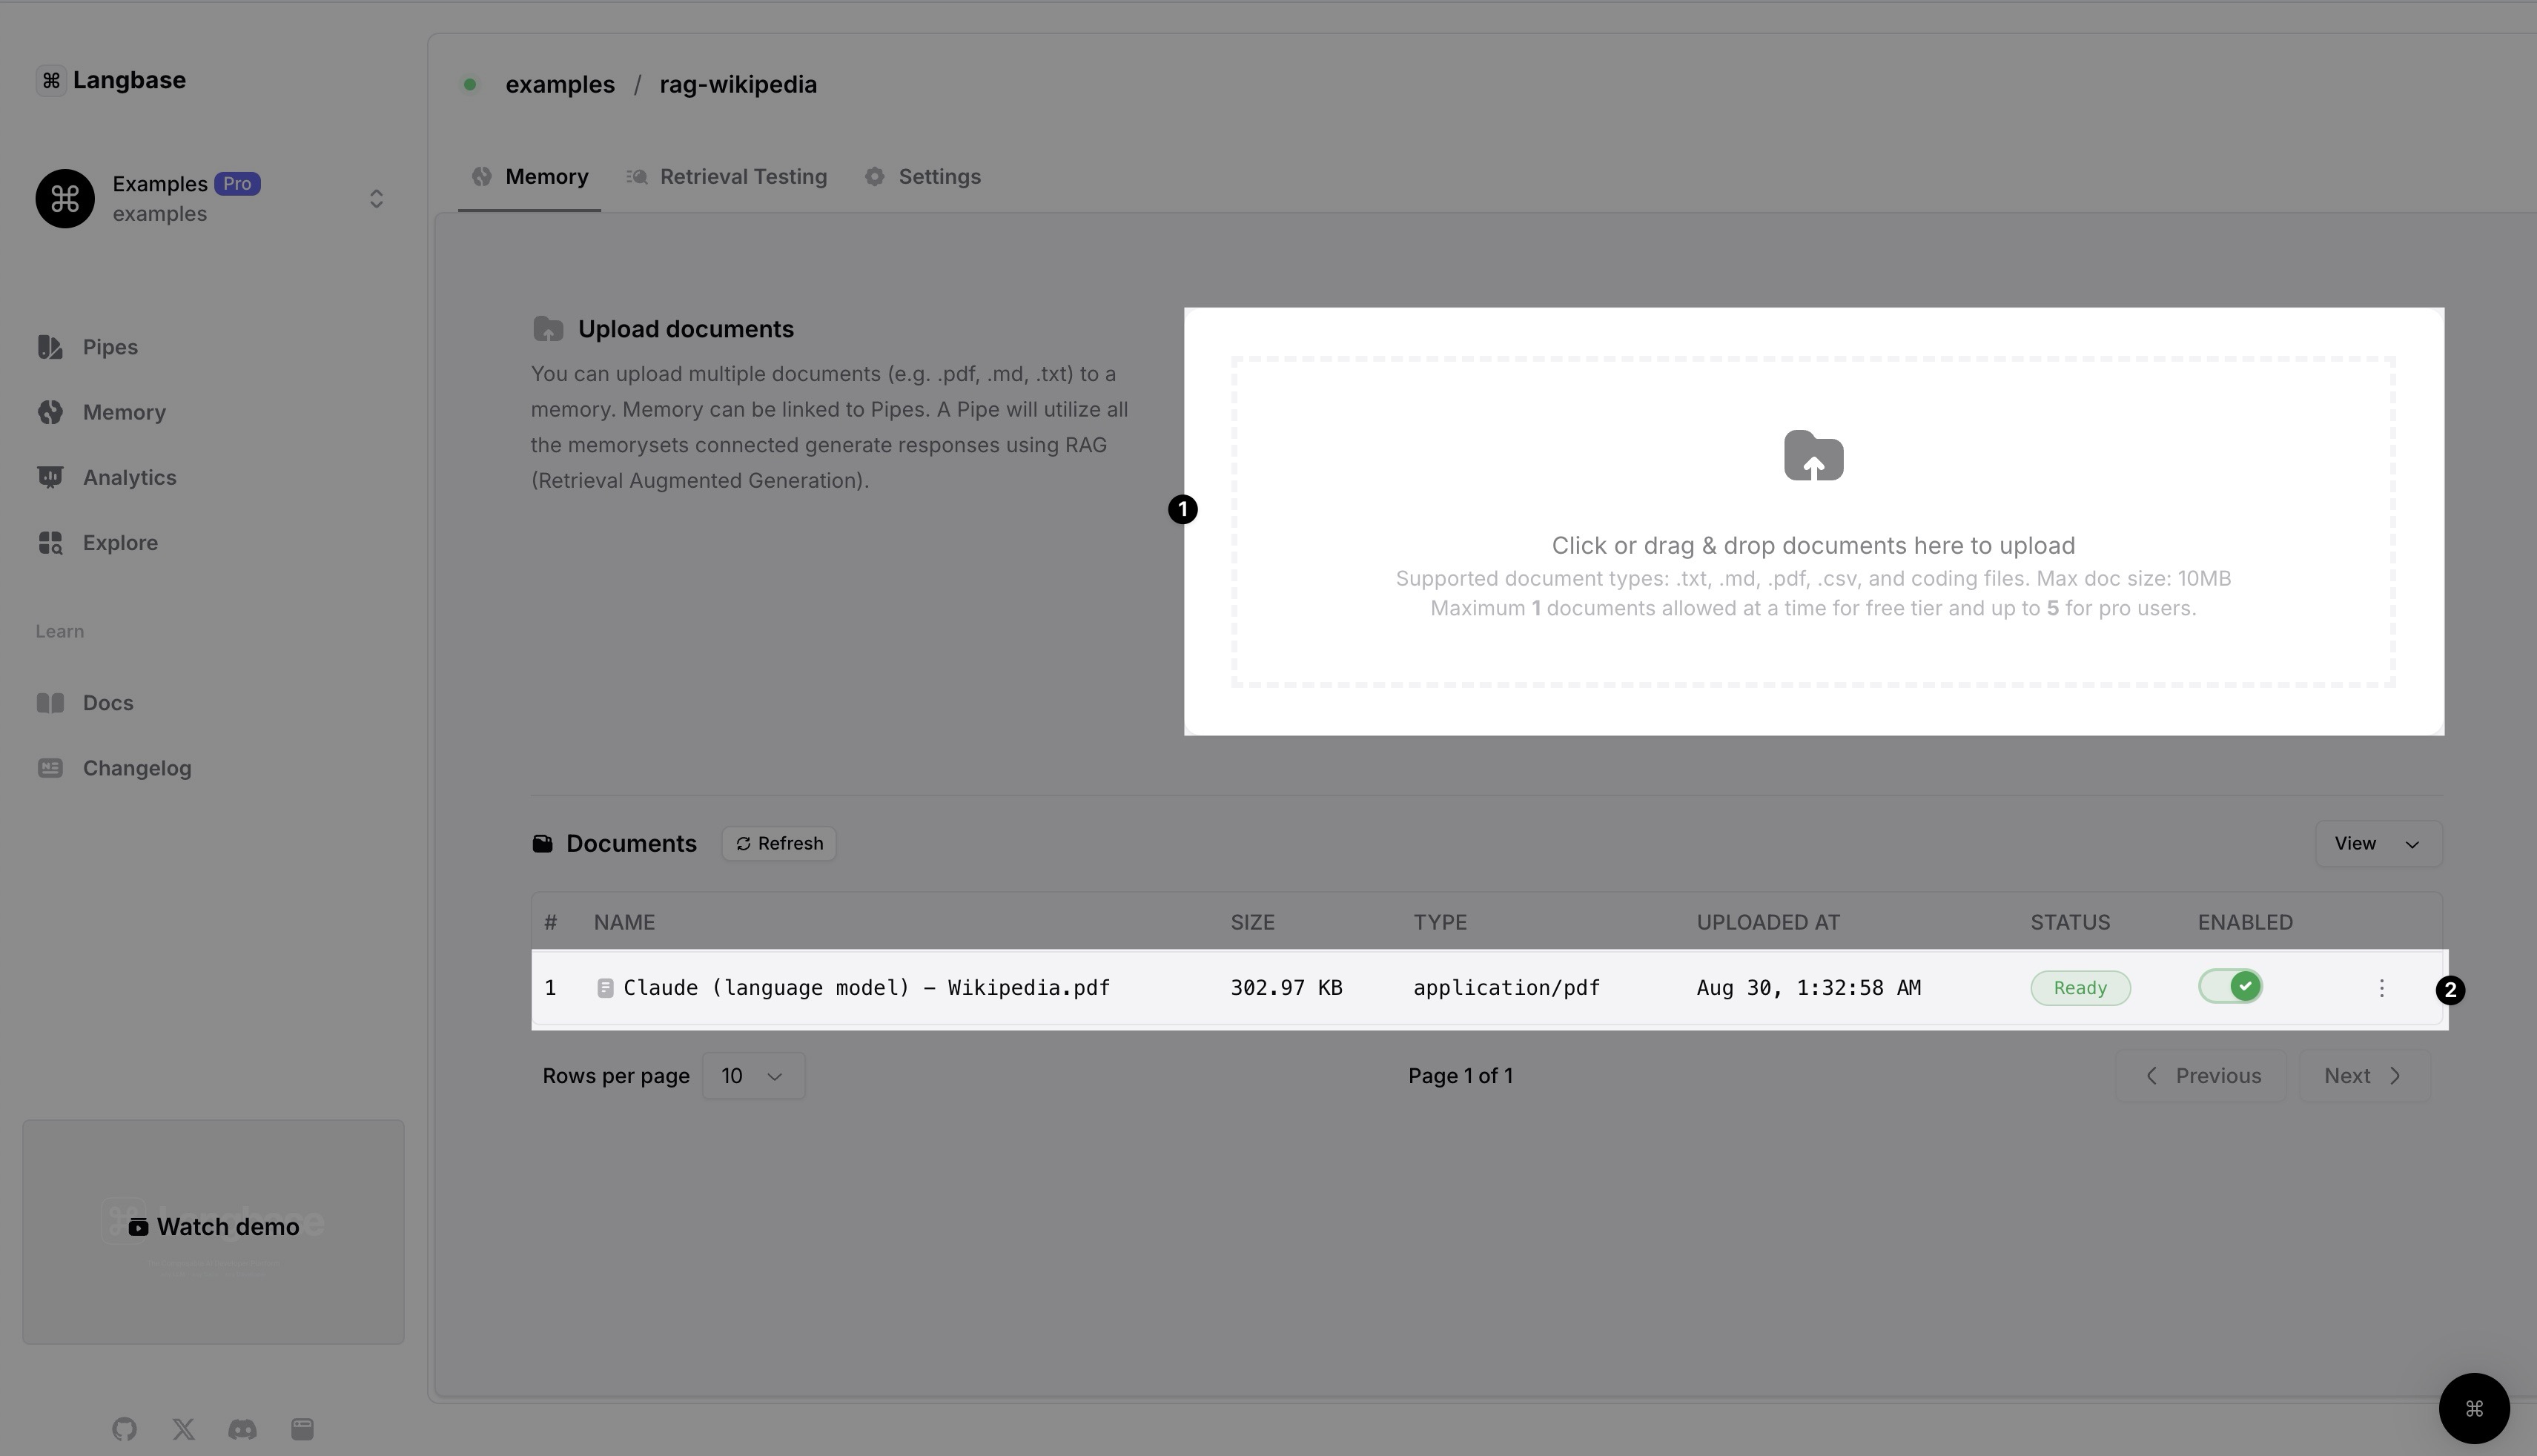
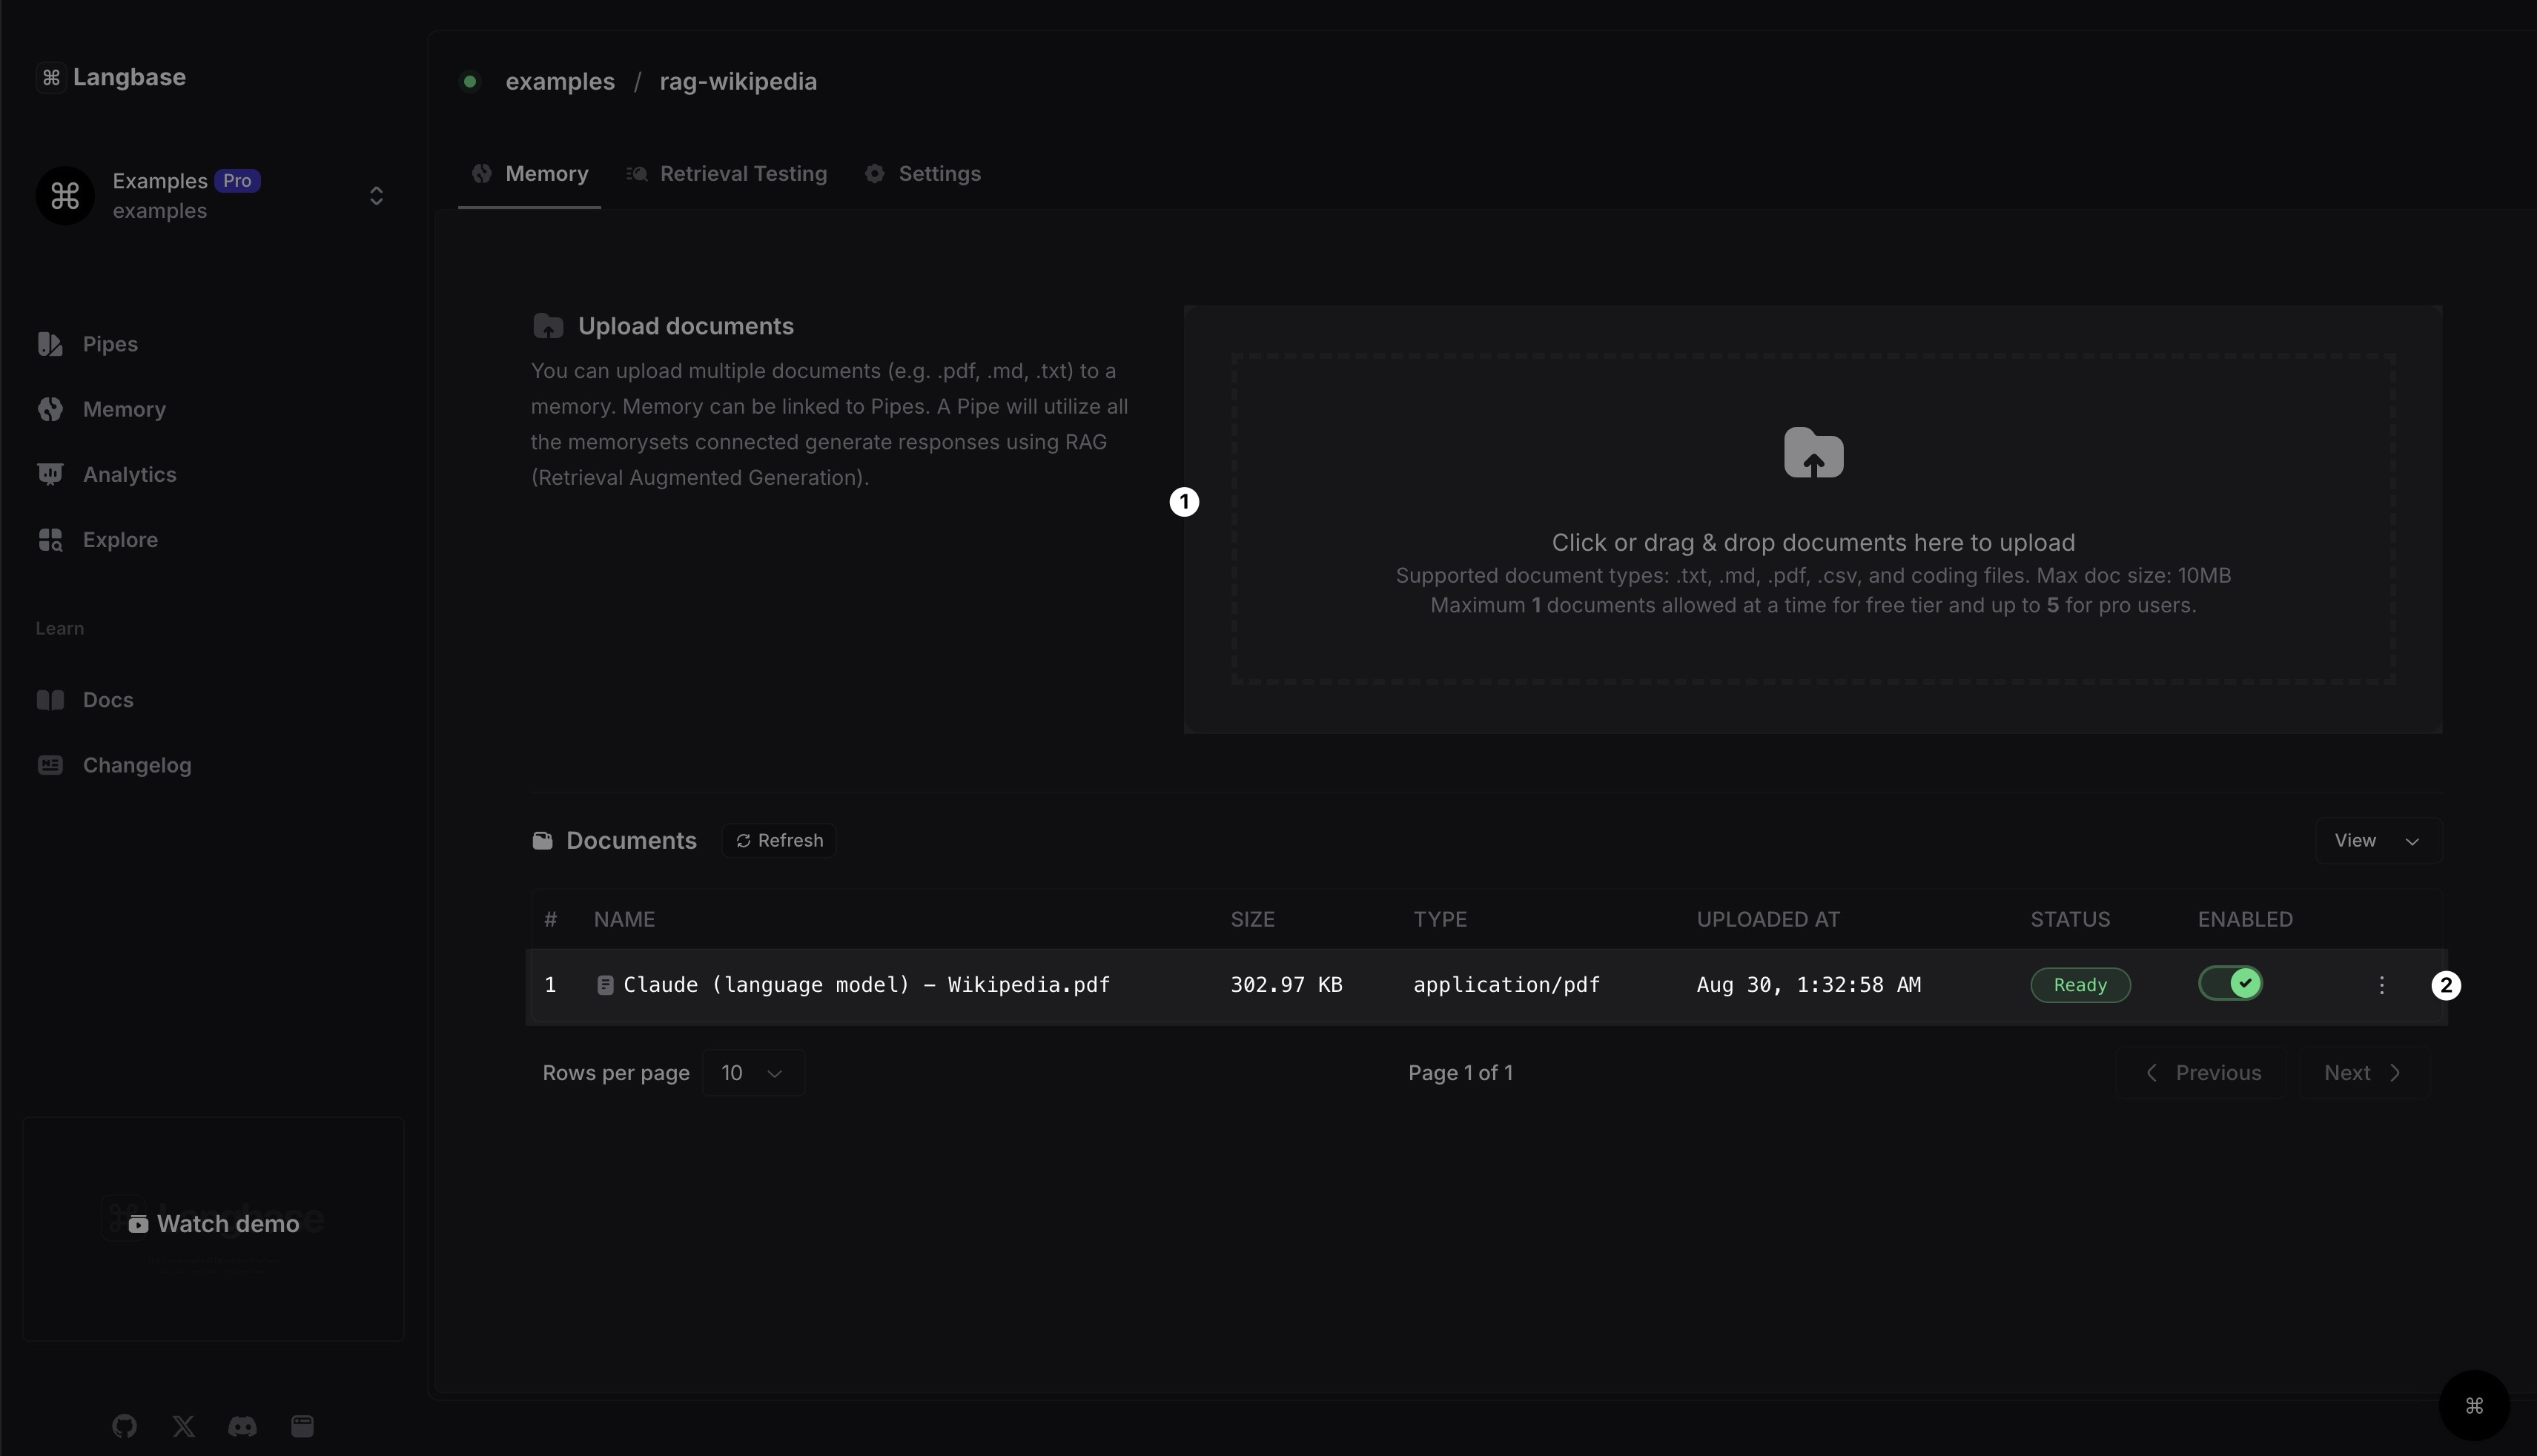
Step 2: Upload RAG Data
Upload the data to the memory you created. You can upload any data for your RAG. For this example, we uploaded a PDF file of the Wikipedia page of Claude.
You can either drag and drop the file or click on the upload button to select the file. Once uploaded, wait a few minutes to let Langbase process the data. Langbase takes care of chunking, embedding, and indexing the data for you.
Click on the Refresh button to see the latest status. Once you see the status as Ready, you can move to the next step.
Create Memory and Upload Data using Langbase Memory API
Alternatively, we can use the Langbase Memory API to create and upload the data as well.
Create memory and upload data using Langbase Memory API
Create a Memory
1async function createNewMemory() {
2  const url = 'https://api.langbase.com/v1/memory';
3  const apiKey = '<YOUR_API_KEY>';
4
5  const memory = {
6    name: "rag-wikipedia",
7    description: "This memory contains content of AhmadAwais.com homepage",
8  };
9
10  const response = await fetch(url, {
11    method: 'POST',
12    headers: {
13      'Content-Type': 'application/json',
14      Authorization: `Bearer ${apiKey}`,
15    },
16    body: JSON.stringify(memory),
17  });
18
19  const newMemory = await response.json();
20  return newMemory;
21}
You will get a response with the newly created memory object:
1{
2  "name": "rag-wikipedia",
3  "description": "This memory contains content of AhmadAwais.com homepage",
4  "owner_login": "langbase",
5  "url": "https://langbase.com/memorysets/langbase/rag-wikipedia"
6}
Upload Data
Uploading data is a two-step process. First, we get a signed URL to upload the data. Then, we upload the data to the signed URL. Let's see how to get a signed URL:
1async function getSignedUploadUrl() {
2  const url = 'https://api.langbase.com/v1/memory/documents';
3  const apiKey = '<YOUR_API_KEY>';
4
5  const newDoc = {
6    memoryName: 'rag-wikipedia',
7    ownerLogin: 'langbase',
8    fileName: 'ahmadawais-homepage.pdf',
9  };
10
11  const response = await fetch(url, {
12    method: 'POST',
13    headers: {
14      'Content-Type': 'application/json',
15      Authorization: `Bearer ${apiKey}`,
16    },
17    body: JSON.stringify(newDoc),
18  });
19
20  const res = await response.json();
21
22  return res;
23}
Response will contain the signed URL; something like this:
1{
2  "signedUrl": "https://b.langbase.com/..."
3}
Now that we have the signed URL, we can upload the data to it:
1const fs = require("fs");
2
3async function uploadDocument(signedUrl, filePath) {
4  const file = fs.readFileSync(filePath);
5
6  const response = await fetch(signedUrl, {
7    method: 'PUT',
8    headers: {
9      'Content-Type': 'application/pdf',
10    },
11    body: file,
12  });
13
14  return response;
15}
You should get a response with status 200 if the upload is successful. You can upload many other type of files as well. Check out Memory API for more details.
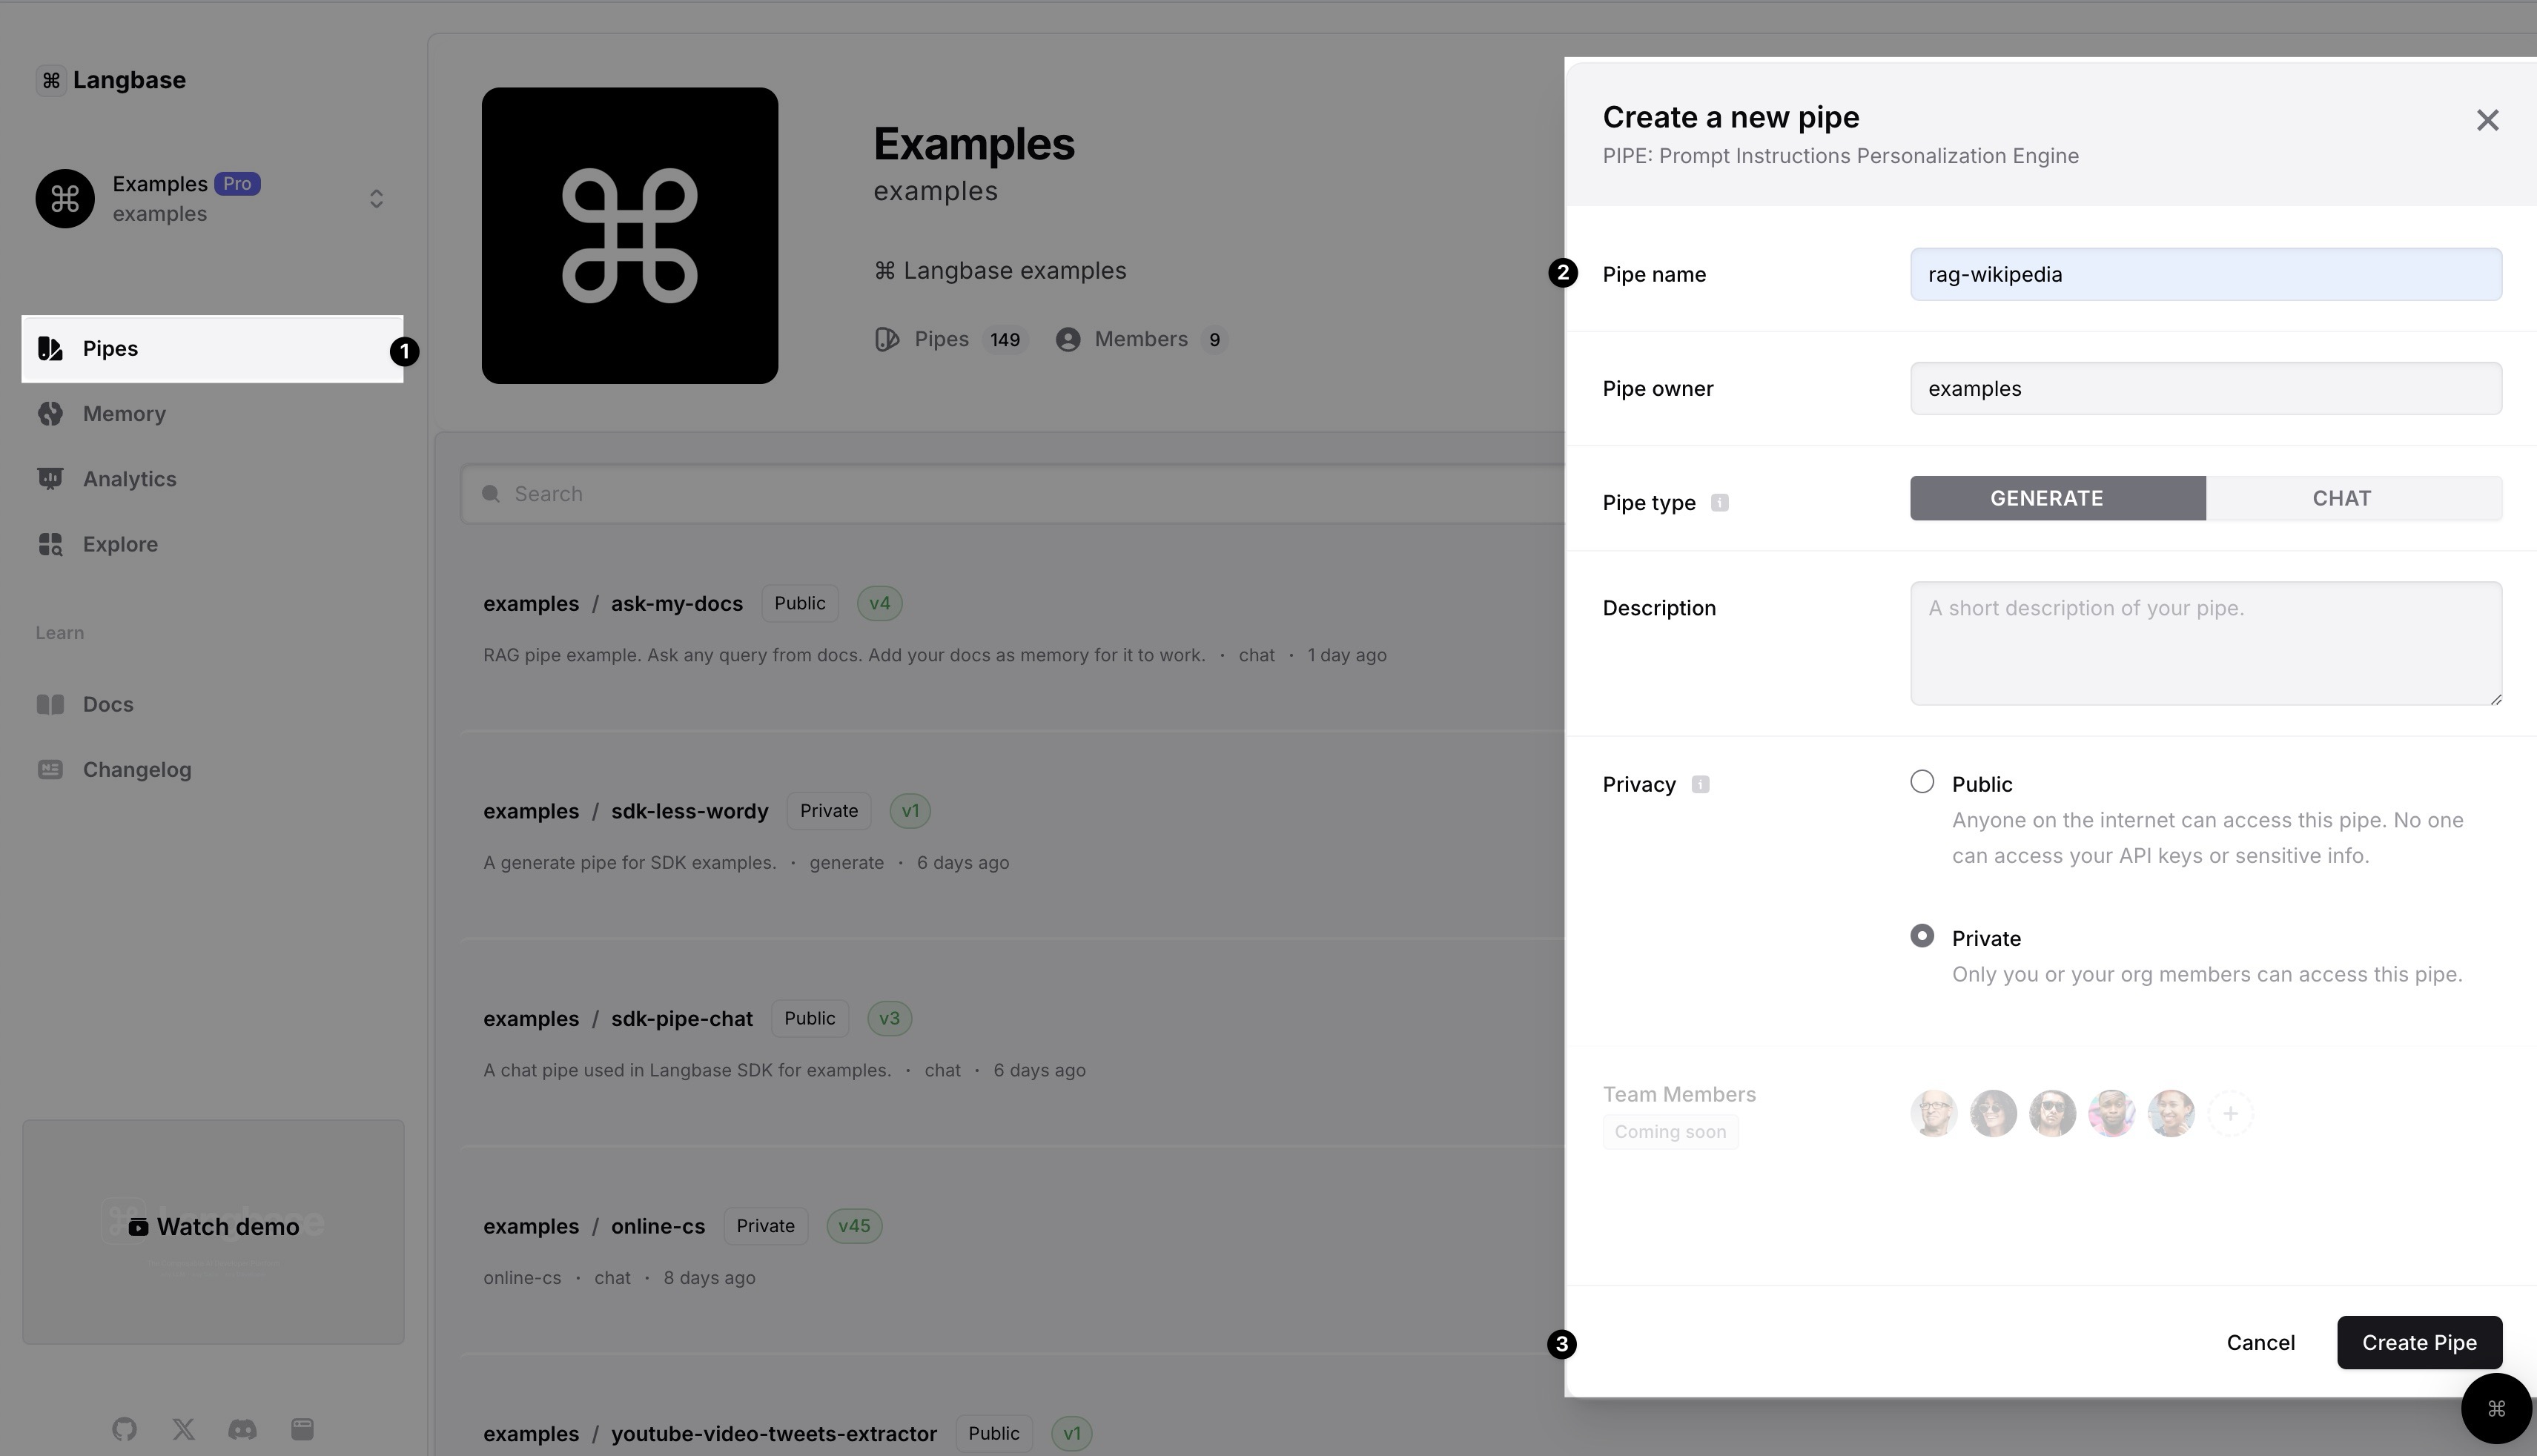
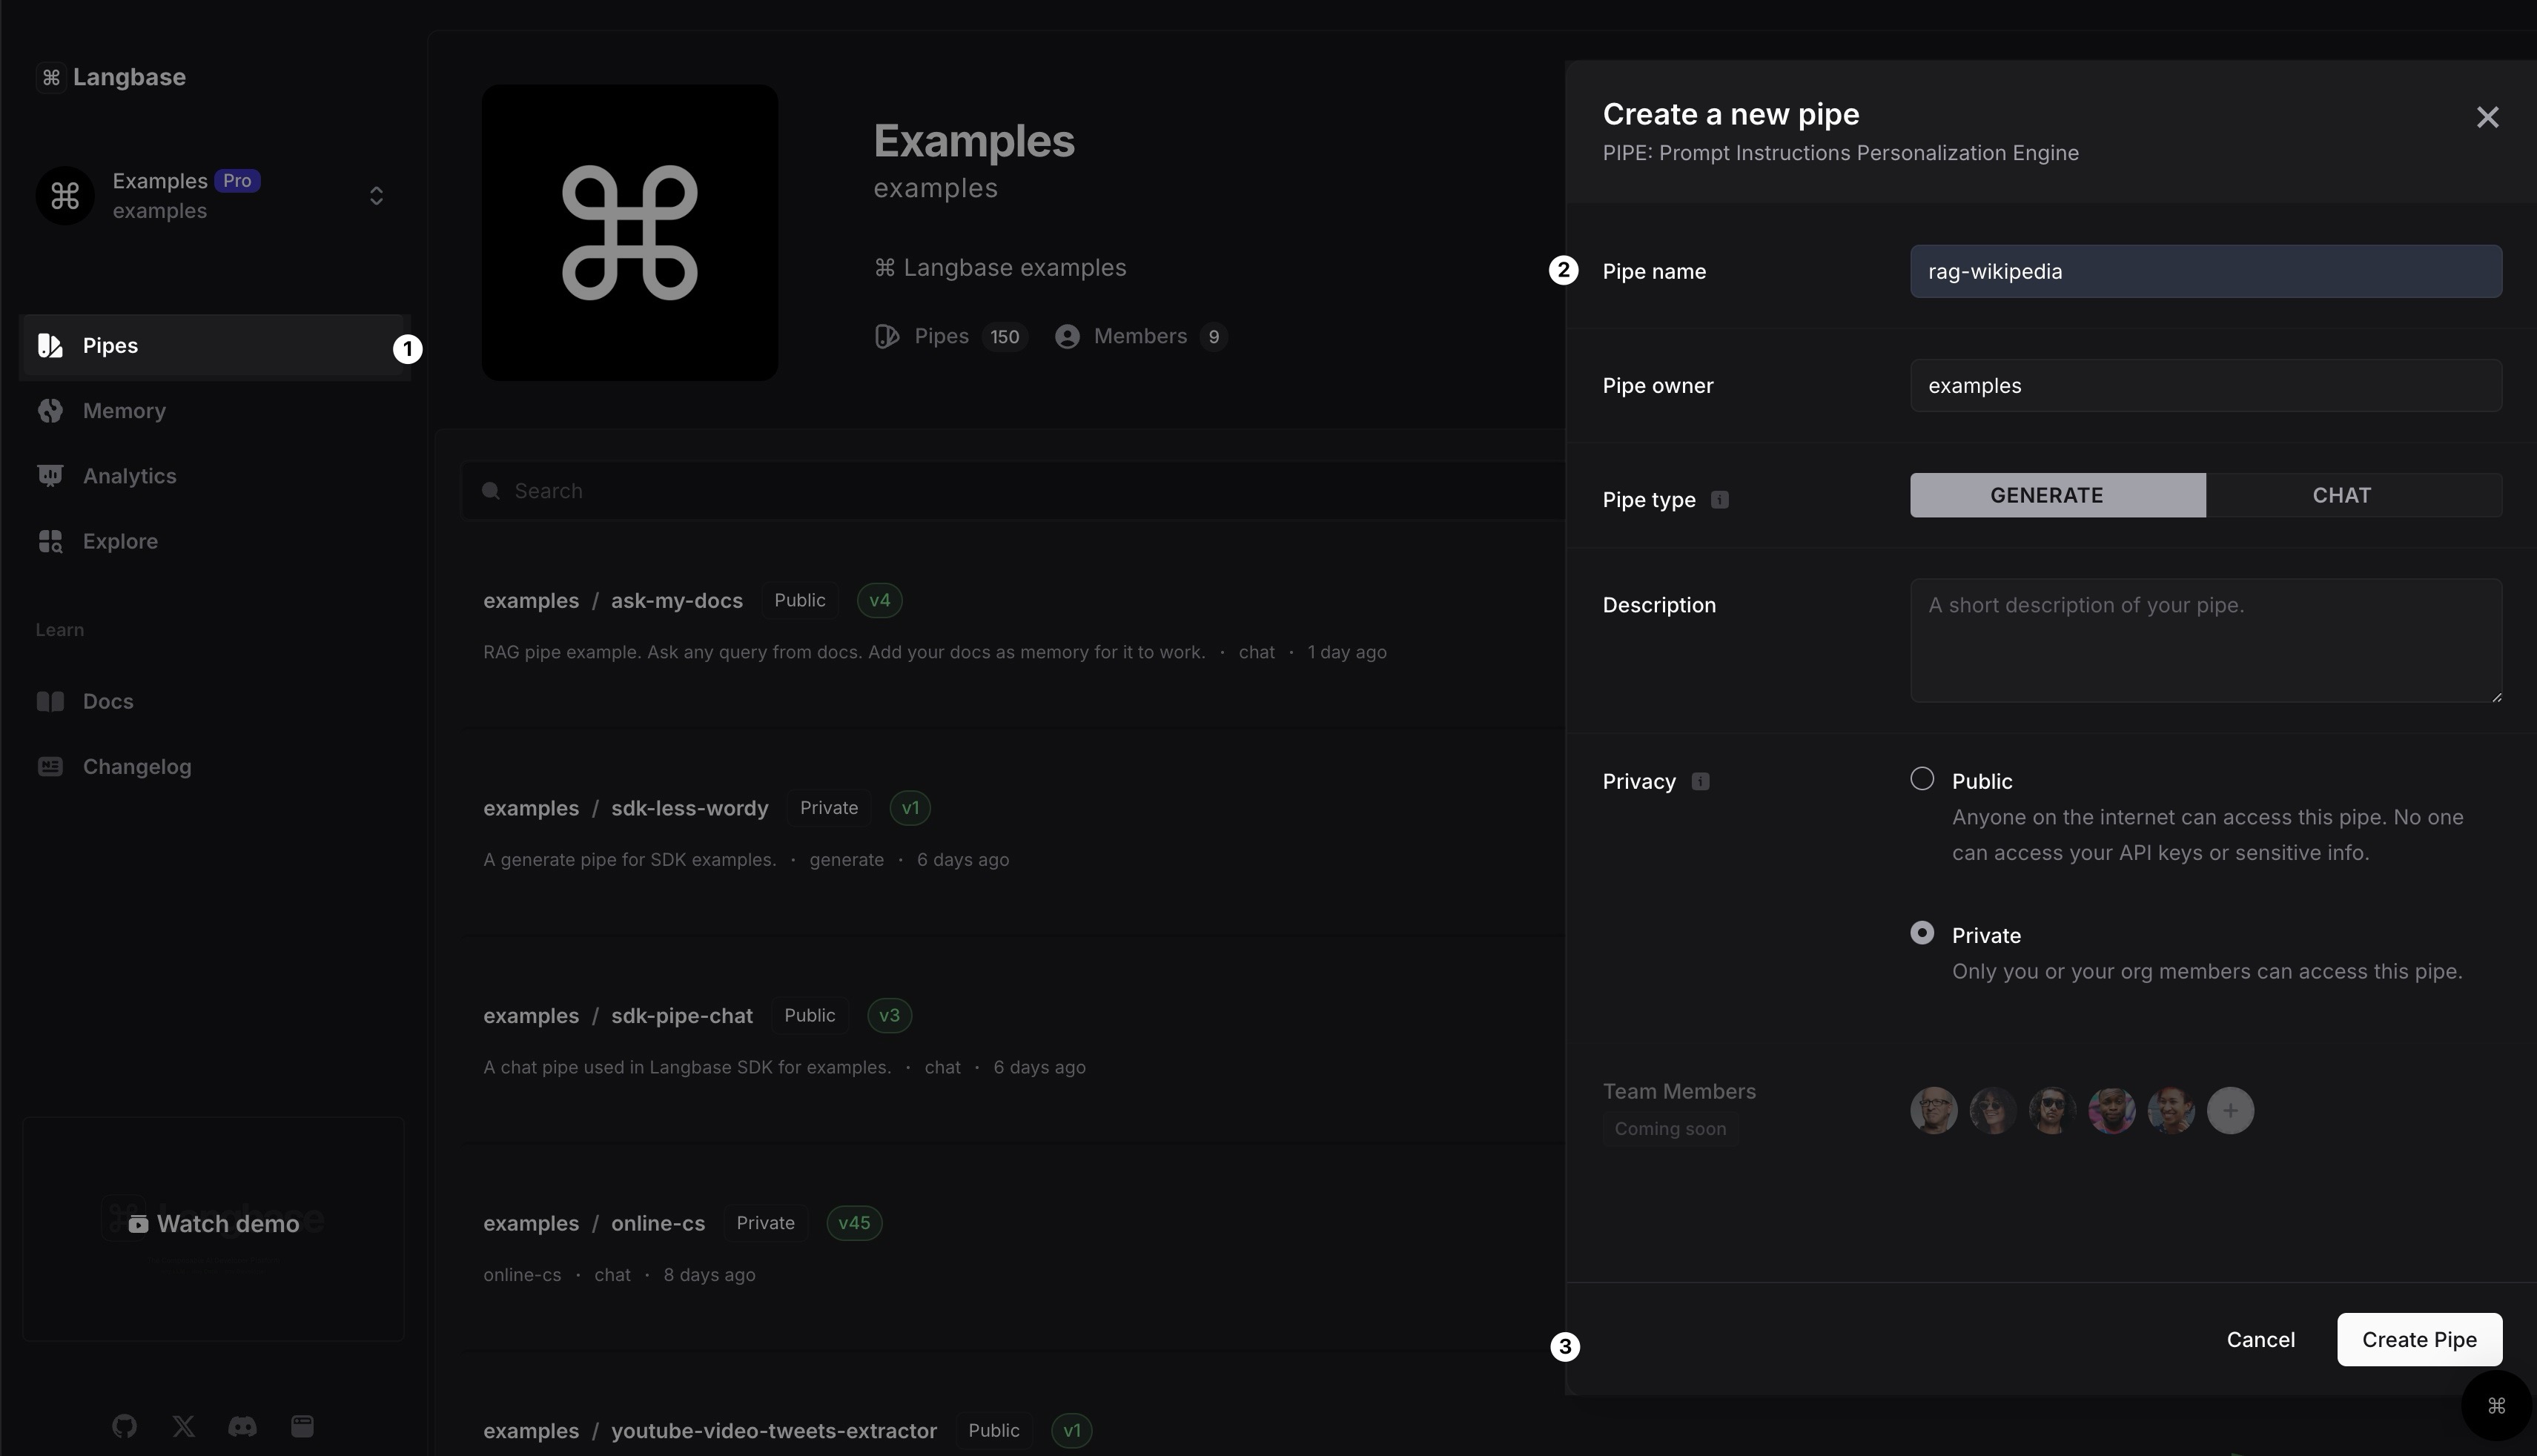
Step 4: Create a Pipe
In your Langbase dashboard, create a new pipe and name it rag-wikipedia. You can also add a description to the pipe.
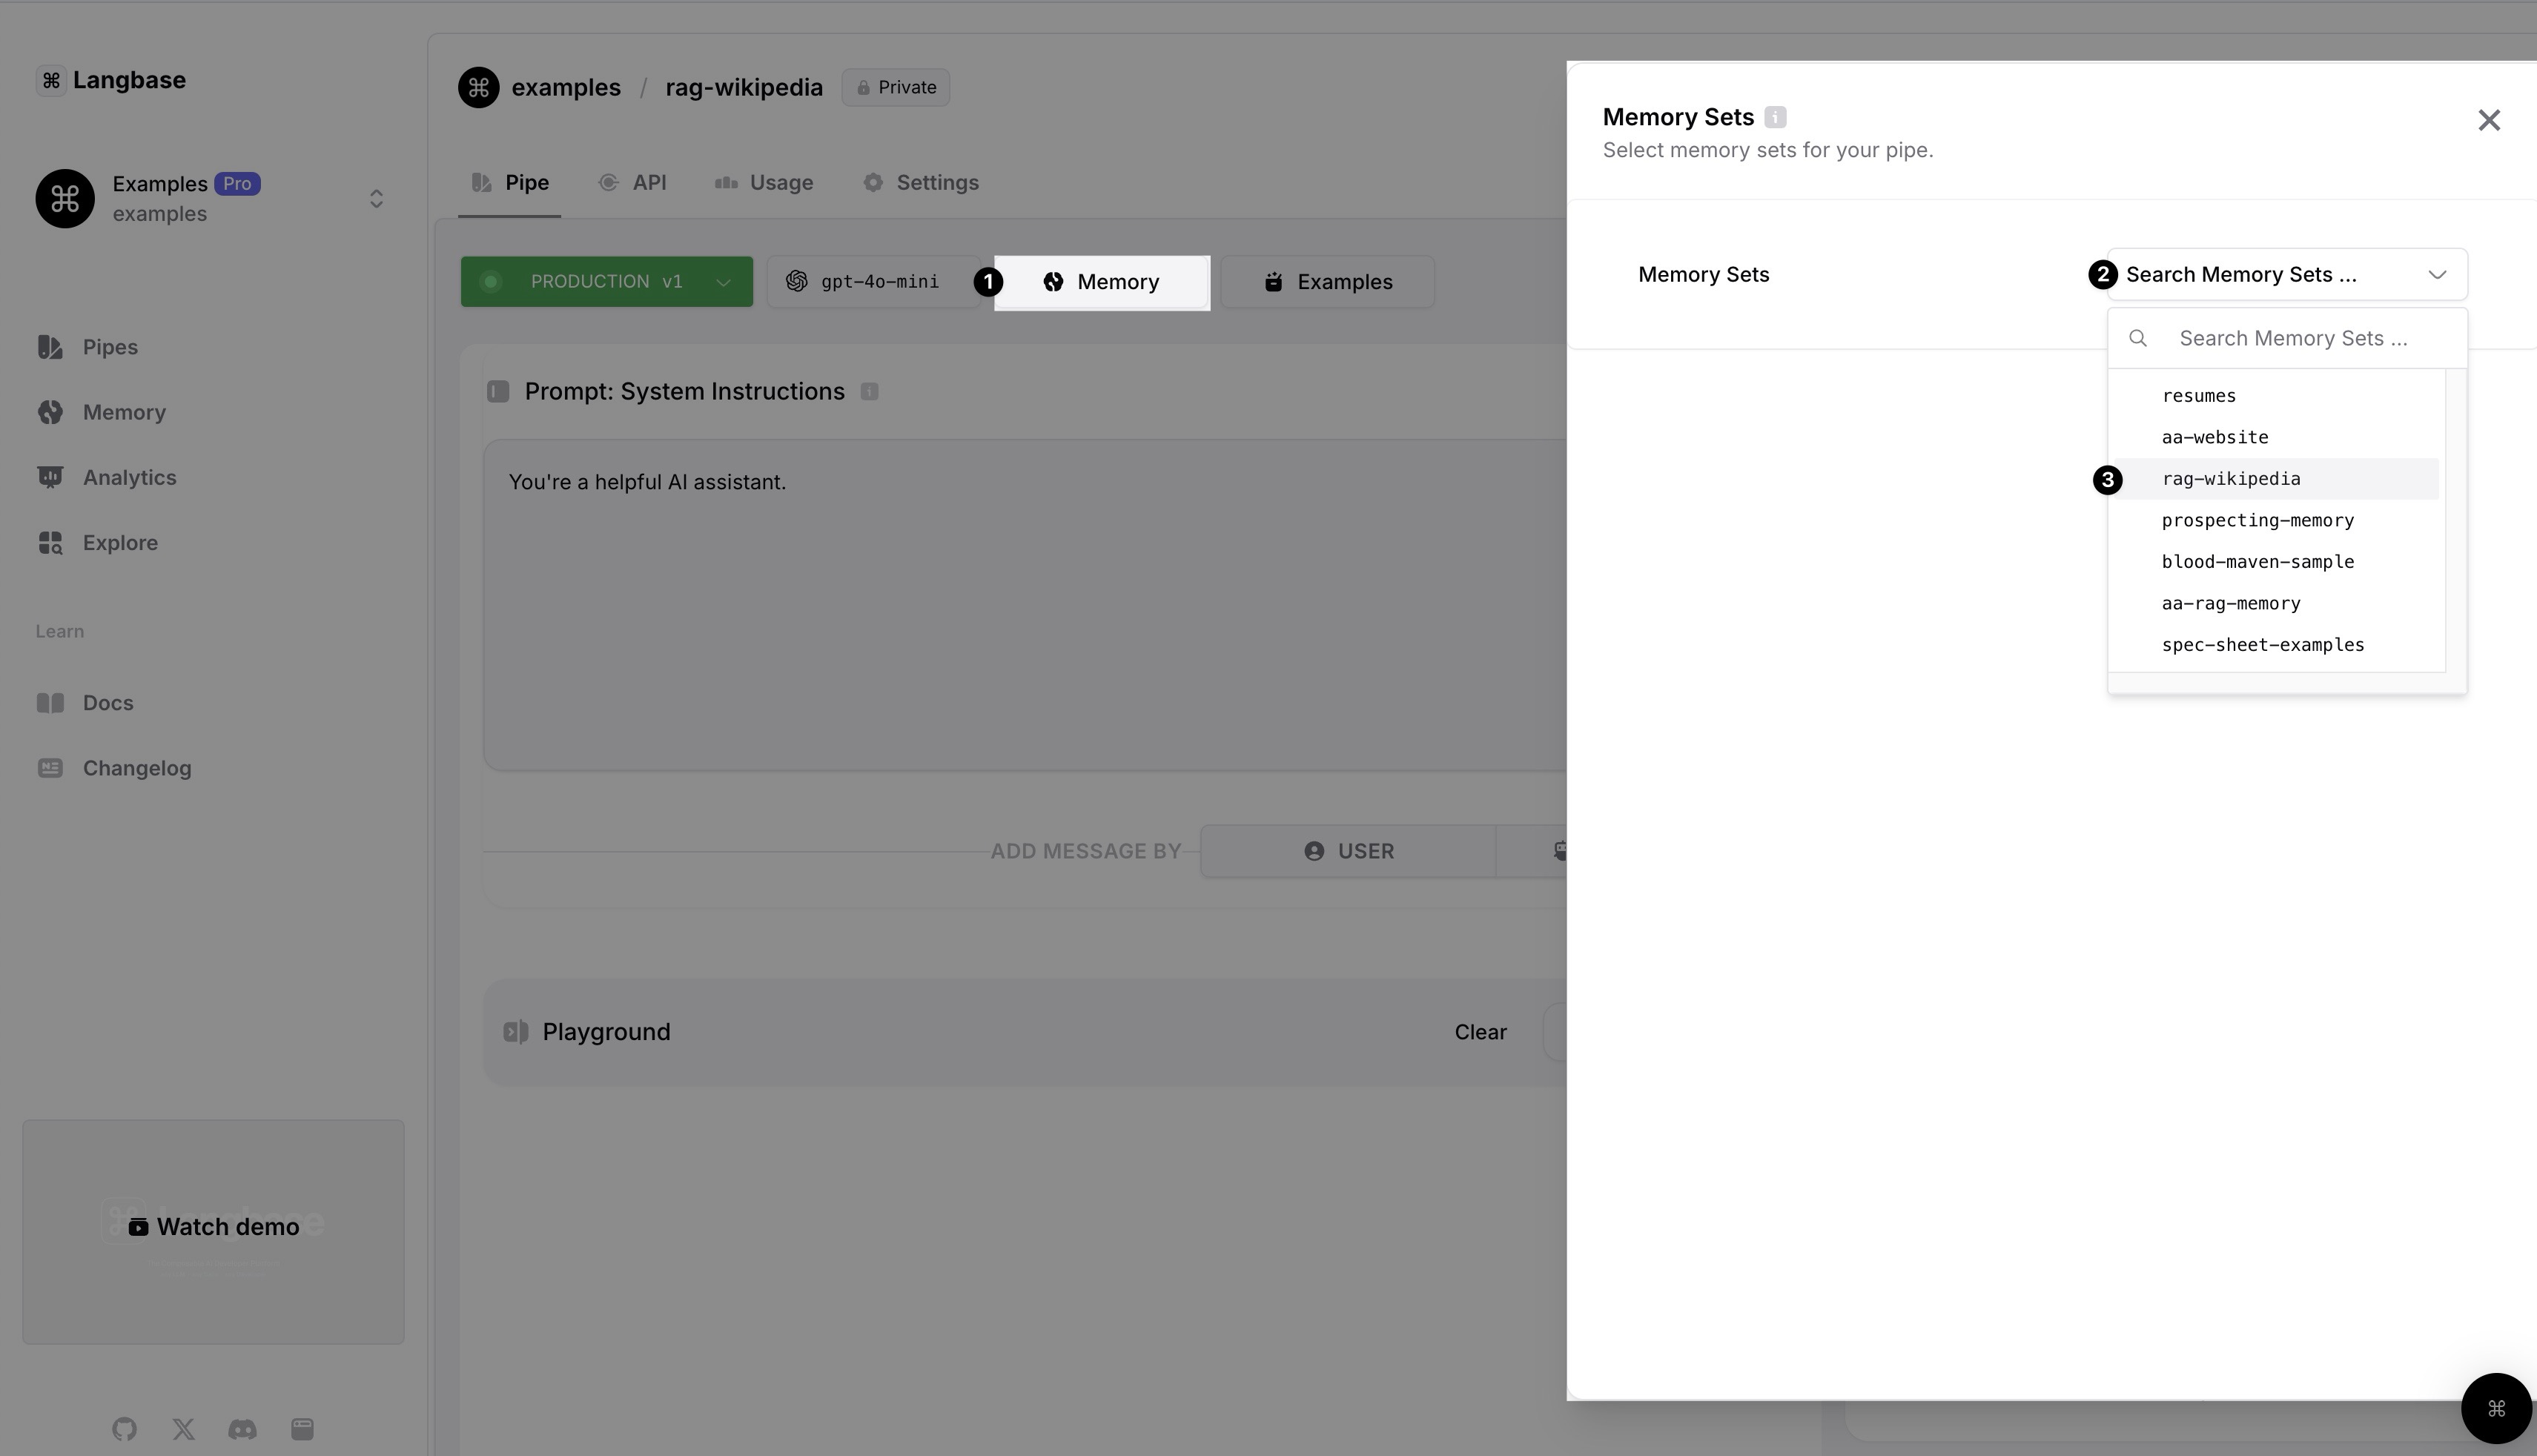
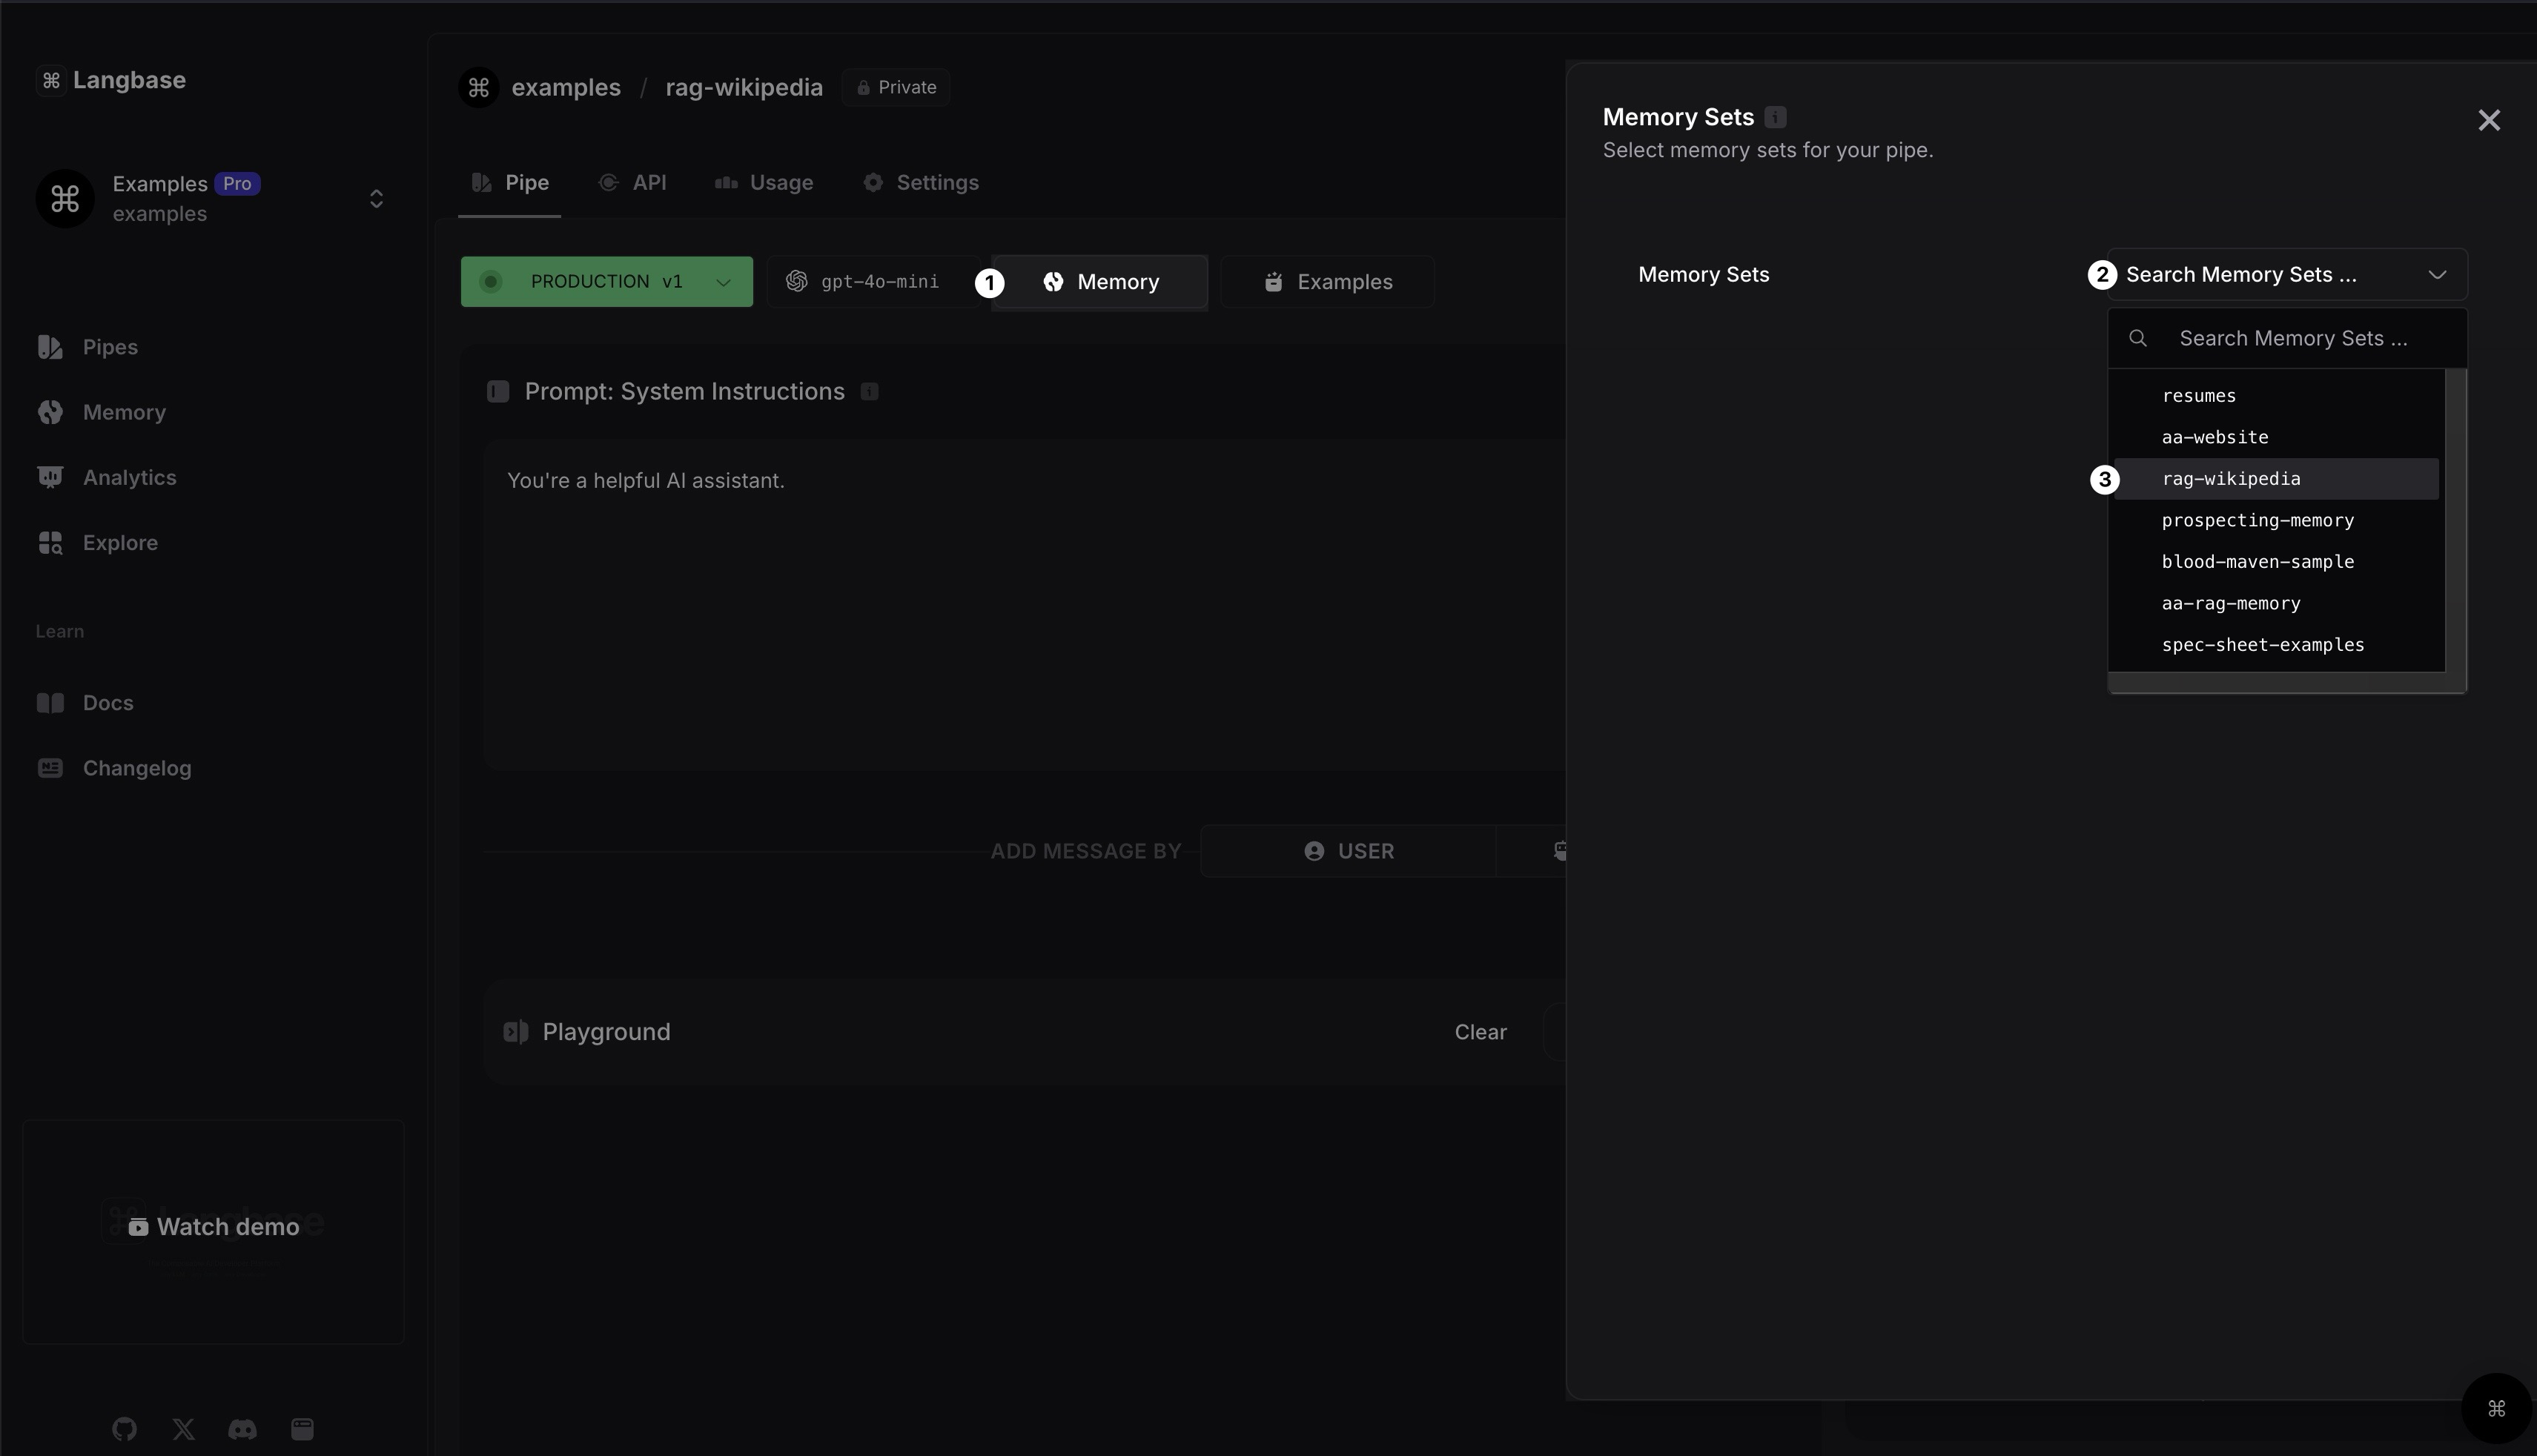
Step 5: Connect Memory to Pipe
Open the newly created pipe and click on the Memory button. From dropdown, select the memory you created in the previous step and that's it.
Now that we have created a memory, uploaded data to it, and connected it to a pipe, we can create a Next.js application that uses Langbase SDK to generate responses.
Step 6: Clone the Starter Project
Clone the RAG Starter Project to get started. The app contains a single page with a form to ask a question from documents. This project uses:
- Langbase SDK
- Langbase Pipe
- Langbase Memory
- Next.js
- Tailwind CSS
Step 7: Install Dependencies and Langbase SDK
Install the dependencies using the following command:
1npm installInstall the Langbase SDK using the following command:
1npm install langbaseStep 8:
Create a route app/api/generate/route.ts and add the following code:
1import { Pipe } from 'langbase';
2import { NextRequest } from 'next/server';
3
4/**
5 * Generate response and stream from Langbase Pipe.
6 *
7 * @param req
8 * @returns
9 */
10export async function POST(req: NextRequest) {
11	try {
12		if (!process.env.LANGBASE_PIPE_API_KEY) {
13			throw new Error(
14				'Please set LANGBASE_PIPE_API_KEY in your environment variables.'
15			);
16		}
17
18		const { prompt } = await req.json();
19
20		// 1. Initiate the Pipe.
21		const pipe = new Pipe({
22			apiKey: process.env.LANGBASE_PIPE_API_KEY
23		});
24
25		// 2. Generate a stream by asking a question
26		const stream = await pipe.streamText({
27			messages: [{ role: 'user', content: prompt }]
28		});
29
30		// 3. Done, return the stream in a readable stream format.
31		return new Response(stream.toReadableStream());
32	} catch (error: any) {
33		return new Response(error.message, { status: 500 });
34	}
35}
Step 9:
Go to starters/rag-ask-docs/components/langbase/docs-qna.tsx and add following import:
1import { fromReadableStream } from 'langbase';Add the following code in DocsQnA component after the states declaration:
1const handleSubmit = async (e: React.FormEvent) => {
2		// Prevent form submission
3		e.preventDefault();
4
5		// Prevent empty prompt or loading state
6		if (!prompt.trim() || loading) return;
7
8		// Change loading state
9		setLoading(true);
10		setCompletion('');
11		setError('');
12
13		try {
14			// Fetch response from the server
15			const response = await fetch('/api/generate', {
16				method: 'POST',
17				body: JSON.stringify({ prompt }),
18				headers: { 'Content-Type': 'text/plain' },
19			});
20
21			// If response is not successful, throw an error
22			if (response.status !== 200) {
23				const errorData = await response.text();
24				throw new Error(errorData);
25			}
26
27			// Parse response stream
28			if (response.body) {
29				// Stream the response body
30				const stream = fromReadableStream(response.body);
31
32				// Iterate over the stream
33				for await (const chunk of stream) {
34					const content = chunk?.choices[0]?.delta?.content;
35					content && setCompletion(prev => prev + content);
36				}
37			}
38		} catch (error: any) {
39			setError(error.message);
40		} finally {
41			setLoading(false);
42		}
43	};
Replaces the following piece of code in DocsQnA component:
1onSubmit={(e) => {
2	e.preventDefault();
3}}
With the following code:
1onSubmit={handleSubmit}Step 10:
Create a copy of .env.local.example and rename it to .env.local. Add the API key of the pipe that we created in step #4 to the .env.local file:
1# !! SERVER SIDE ONLY !!
2# Pipes.
3LANGBASE_PIPE_API_KEY="YOUR_PIPE_API_KEY"
Step 11:
Run the project using the following command:
1npm run devYour app should be running on http://localhost:3000. You can now ask questions from the documents you uploaded to the memory.
🎉 That's it! You have successfully implemented a RAG application. It is a Next.js application you can deploy it to any platform of your choice like Vercel, Netlify, or Cloudflare.
Live Demo
You can see the live demo of this project here.
Further resources:
- Complete code on GitHub.
- Pipe used in this example on Langbase Pipes.


